Essential Materials
Before you start sewing, gather these supplies:
- Sharp fabric scissors
- Needle and thread (sizes 16-18 needles for standard fabric)
- Quality thread – choose thread that matches your patch edge for invisible repairs, or contrasting thread for decorative effects
- Straight pins or tape to secure the patch during preparation
- Iron for pressing
- Thimble (helpful when pushing the needle through thick materials)
For machine sewing, ensure your sewing machine is in good working order with the appropriate presser foot attached.
Understanding Patch Types
Embroidered patches with finished edges are most common and easiest to work with. These feature dense embroidery stitching that looks shiny and professional borders that won’t fray. You can find quality embroidered patches on Etsy for unique designs.
Iron-on patches come with adhesive backing and thin paper covering. While you can use heat to adhere these patches initially, always follow up with stitching for durability—the glue alone may run during laundry.
Printed patches offer vibrant colors and detailed designs, often featuring cotton backing for comfort.
Sew-on patches without borders require extra care at the edge of the patch to prevent fraying.
Preparation Steps
- Clean your garment and remove any loose threads
- Position the patch where desired, considering both function and aesthetics
- Test placement by pinning temporarily—check the look from multiple angles
- If working with iron-on patches, remove the thin paper covering first
- Pre-wash both fabric and the patch if possible to prevent shrinkage issues
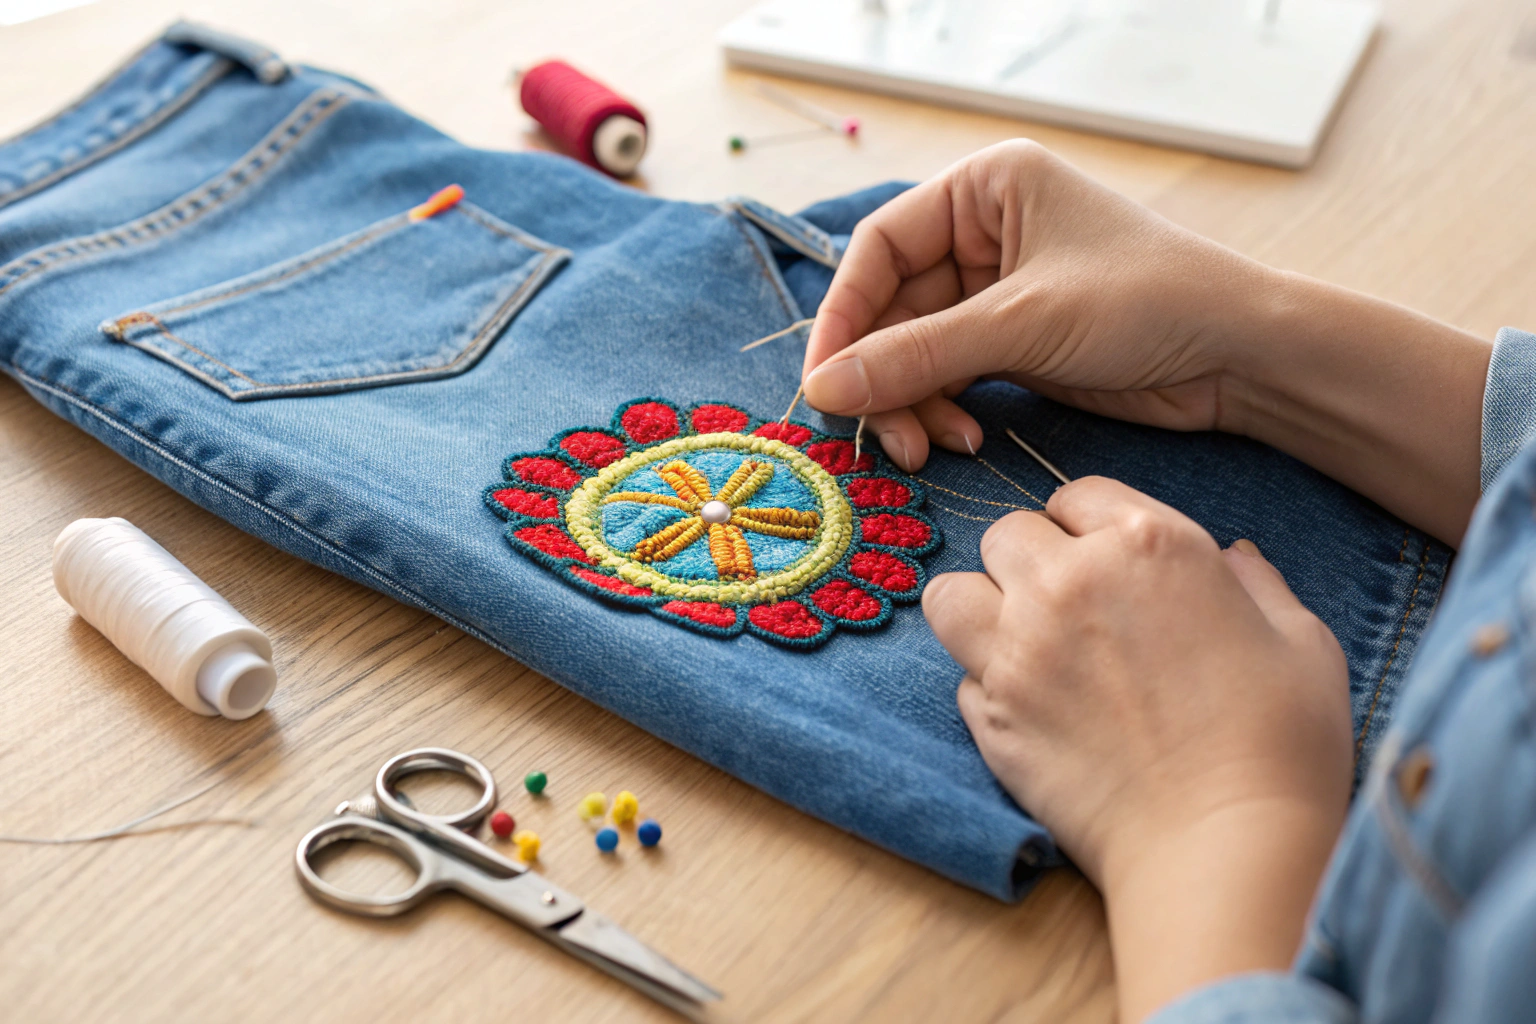
Hand Sewing Method (Preferred Method)
Hand sewing gives you maximum control and creates the most durable attachment.
Getting Started
- Cut thread about 18 inches long—longer may tangle, shorter means you’ll run out of thread frequently
- For extra strength, use double thread by folding your thread in half
- Tie a secure knot at the end and hide the knot on the wrong side (backside of the fabric)
Basic Hand Sewing Technique
- Start your first stitch by bringing the needle up through the fabric from the wrong side, about 1/8 inch from the edge of the patch
- Attach the patch to the fabric by pushing your needle down through both layers
- Bring it all the way through to the backside, then come up with the needle about 1/8 inch to the right of your previous stitch
- Continue this process, keeping stitches close to the edge but not too tightly—this can cause puckering
- When you reach where you started, put your needle back down into the hole where you began to complete the circuit
Backstitch Method (Most Secure)
For maximum durability, use the backstitch:
- After making your first stitch, put your needle back into the fabric about 1/8 inch to the left of your first stitch
- Come up 1/8 inch to the right from where your needle came up previously
- This creates overlapping stitches that won’t fail even if one breaks
Finishing Hand Sewing
- When you’ve sewn all the way around, secure with several small stitches in one spot
- Tie off with a secure knot on the wrong side
- Trim excess thread close to the fabric
Machine Sewing Method
Using a sewing machine offers speed and consistency, especially for multiple patches.
Machine Setup
- Use universal needle (size 16-18)
- Set medium stitch length (2.5-3mm)
- Choose straight stitch for basic application or zigzag stitch for stretch fabrics
- Test settings on fabric scraps first
Machine Sewing Process
- Secure the patch in position with pins or temporary spray adhesive
- Start to sew at a corner or inconspicuous spot
- Sew slowly around the perimeter, maintaining consistent distance from the edge
- Stop with needle down when turning corners to prevent shifting
- Overlap your starting point by about 1/2 inch
- Backstitch at beginning and end to secure
For Thick Patches
When your machine doesn’t go through easily:
- Use a heavier needle (size 18-20)
- Sew more slowly to avoid needle breakage
- Consider hand sewing if the machine struggles
Special Techniques
Working with Stretch Fabrics
- Use zigzag stitch to allow fabric movement
- Don’t stretch the fabric while sewing
- Consider stretch needles for best results
Patches on Pockets or Curves
- Patch and go slowly around curved areas
- Use smaller stitches for better control
- Stop frequently to adjust fabric position
Dealing with Thick Seams
When you encounter thick seam intersections:
- Hand-turn the machine wheel if it doesn’t go automatically
- Use a hammer to gently tap thick areas flat before sewing
- Consider sewing from both directions to meet in the middle
Troubleshooting Common Issues
Thread keeps breaking: Use stronger thread or new thread—old thread weakens over time. For thick patches, switch to button craft thread.
Needle won’t penetrate: You may need a heavier needle or to sew by hand. A thimble helps when pushing the needle through resistant materials.
Patch won’t lie flat: This often happens when fabric and patch have different stretch properties. Pre-washing helps prevent this issue.
Stitches look uneven: Practice maintaining consistent spacing and tension. Like to sew at a steady pace rather than rushing.
Fluff that may appear around the patch edges can be trimmed with sharp scissors after completion.
Creative Applications
Patches aren’t just for repairs—they’re perfect for:
- Personalizing jackets and bags with your favorite designs
- Creating themed collections on denim jackets
- Adding personality to plain garments
- Covering logos you want to hide
- Etsy-worthy custom creations for gifts
Professional Tips
- Always test your technique on fabric scraps first
- Keep extra supplies handy—needles can break, and you may run out of thread
- Work in good lighting to see your stitches clearly
- Take breaks to avoid eye strain and maintain stitch quality
- Practice on old clothes before working on favorites
Maintenance and Care
Once attached, patches typically last as long as the garment itself. Wash in cool water and avoid excessive heat in the dryer, which can weaken thread over time. If a patch starts to lift, repair it promptly to prevent further damage.
Conclusion
Mastering patch application—whether sewing on patches by hand or using your sewing machine—gives you the power to extend garment life, express creativity, and develop a valuable skill. Start with simple projects and work your way up to more complex applications. With practice, you’ll find that attaching a patch becomes second nature, and you’ll wonder why you ever threw away clothes with small holes or stains. Remember, if something doesn’t go as planned, don’t be discouraged—even experienced sewers learn how to sew through trial and error. The key is to start simple and build your confidence with each successful project.