Spooky trunk or treat ideas offer creative ways to decorate your car for a Halloween event, transforming your vehicle’s trunk into a mini haunted experience. These themes range from classic monster lairs and witch’s cauldrons to eerie graveyards and creepy clown carnivals. The goal is to provide a fun, slightly scary backdrop for handing out candy, but it is important to consider the age of the attendees and keep decorations safe, secure, and appropriate for everyone involved in the community event.
Key Benefits at a Glance
- Budget-Friendly Fun: Creates a high-impact look using inexpensive materials like cobwebs, cardboard cutouts, and sheets.
- Memorable Experience: Makes your vehicle a standout attraction that kids and parents will remember long after the event.
- Simple Setup & Takedown: Most spooky themes rely on simple props that are easy to assemble and remove quickly afterward.
- Adjustable Scare-Factor: Allows you to easily control the spookiness level to be fun for all ages, from toddlers to teens.
- Reusable Decor: Encourages the use of durable items like plastic skeletons, fabric backdrops, and faux pumpkins for future Halloweens.
Purpose of this guide
This guide helps parents, school volunteers, and church groups find inspiring and achievable spooky trunk or treat ideas. It solves the common problem of choosing a theme that is creative, budget-friendly, and simple to execute in a busy parking lot setting. You will discover practical ways to transform your trunk into a haunted masterpiece without spending too much time or money. We will cover tips for popular themes, highlight mistakes to avoid like unsafe props or overly complex designs, and help you create a fun, safe, and memorable experience for all trick-or-treaters.
Introduction to Trunk or Treat Events
My first trunk or treat experience happened completely by accident seven years ago when I stumbled upon a community event while running errands. Watching families move from car to car, seeing elaborate displays that rivaled professional haunted houses, and witnessing the pure joy on children’s faces as they collected treats in a safe environment immediately captured my imagination. That spontaneous discovery transformed into what has become my favorite Halloween tradition.
Since that first encounter, I’ve hosted trunk displays for six consecutive years and participated in over twenty community events. According to recent surveys, trunk or treat events have grown by 300% in the past decade, becoming the fastest-growing Halloween tradition in America. My passion for creating memorable Halloween experiences has led me to experiment with everything from simple spider invasions to elaborate movie-themed displays, each one teaching me valuable lessons about balancing creativity with age-appropriate fun.
For additional inspiration, visit the event overview or browse theme decorations for a complete supply list.
Finding the Perfect Balance of Spooky for All Ages
Creating the perfect spooky atmosphere without traumatizing young children requires what I call the “startle vs. scare” distinction. A startle creates momentary surprise followed by delight, like a friendly ghost that pops up unexpectedly. A scare, on the other hand, creates lasting fear and sends children running to their parents. Learning this difference came from experience when my overly realistic zombie display in year two resulted in several crying toddlers and taught me the importance of reading my audience.
Make trunk-or-treat part of your family’s seasonal traditions—just like these meaningful summer and holiday rituals: Ultimate Guide to Summer Family Traditions.
The key lies in understanding that children want to feel brave, not terrified. My framework involves testing every decoration at child eye level, ensuring that surprise elements reveal themselves as playful rather than menacing. I learned to incorporate familiar characters with spooky twists, use humor to defuse tension, and always provide clear sight lines so children can see what they’re approaching. The goal is creating an atmosphere where kids feel excited to explore rather than hesitant to approach.
After refining my approach over multiple events, I’ve discovered that the most successful spooky displays make children feel like they’re part of an adventure story rather than victims in a horror movie. This philosophy has guided every display I’ve created since that learning experience, resulting in trunk setups that generate squeals of delight rather than tears of fear.
- DO use friendly ghost faces instead of menacing ones
- DO incorporate bright accent colors with traditional Halloween colors
- DO test decorations at child eye level for impact
- DON’T use sudden movements or jump scares
- DON’T create displays that block visibility or create trip hazards
- DON’T use realistic gore or violence themes
Color Psychology for Spooky Trunks
Color choices dramatically impact how scary decorations feel to children, a discovery I made when comparing reactions to my all-black cemetery display versus one incorporating purple and silver accents. The darker display sent younger children hiding behind their parents, while the same tombstones with purple lighting and silver details attracted curious exploration. Understanding color psychology has become one of my most powerful tools for calibrating the spookiness level of any display.
Purple creates mystery without menace, orange maintains Halloween tradition while feeling festive, and strategic use of white or silver adds an ethereal quality that feels magical rather than frightening. For lighting, I’ve learned that colored gels over regular bulbs create atmosphere more effectively than stark white spotlights, while battery-operated string lights in warm tones provide enough illumination for safety without harsh shadows that might frighten sensitive children.
Non-Scary Alternatives with Halloween Spirit
Not every Halloween display needs spooky elements to capture the festive spirit of the season. My experience creating family-friendly alternatives taught me that Halloween’s essence lies in creativity, community, and celebration rather than fear. These non-scary displays have become especially popular with families who have very young children, sensory-sensitive kids, or parents who prefer focusing on the fun aspects of Halloween rather than frightening elements.
The positive feedback I’ve received from parents and children at community events confirms that these alternatives often generate as much excitement as traditional spooky displays. Themes like harvest celebrations, favorite characters in Halloween costumes, or magical fairy tale settings allow children to engage with Halloween traditions while feeling completely safe and comfortable throughout their trick-or-treating experience.
Glam Halloween with Pink and Purple
Creating an Instagram-worthy Halloween display using pink, silver, and purple transformed my traditional orange-and-black approach into something unexpectedly elegant. Using metallic balloon arches, glitter-covered pumpkins, and rose gold skeleton decorations, this glamorous setup attracted attention from both children enchanted by the sparkly elements and parents impressed by the sophisticated aesthetic that still maintained clear Halloween identity.
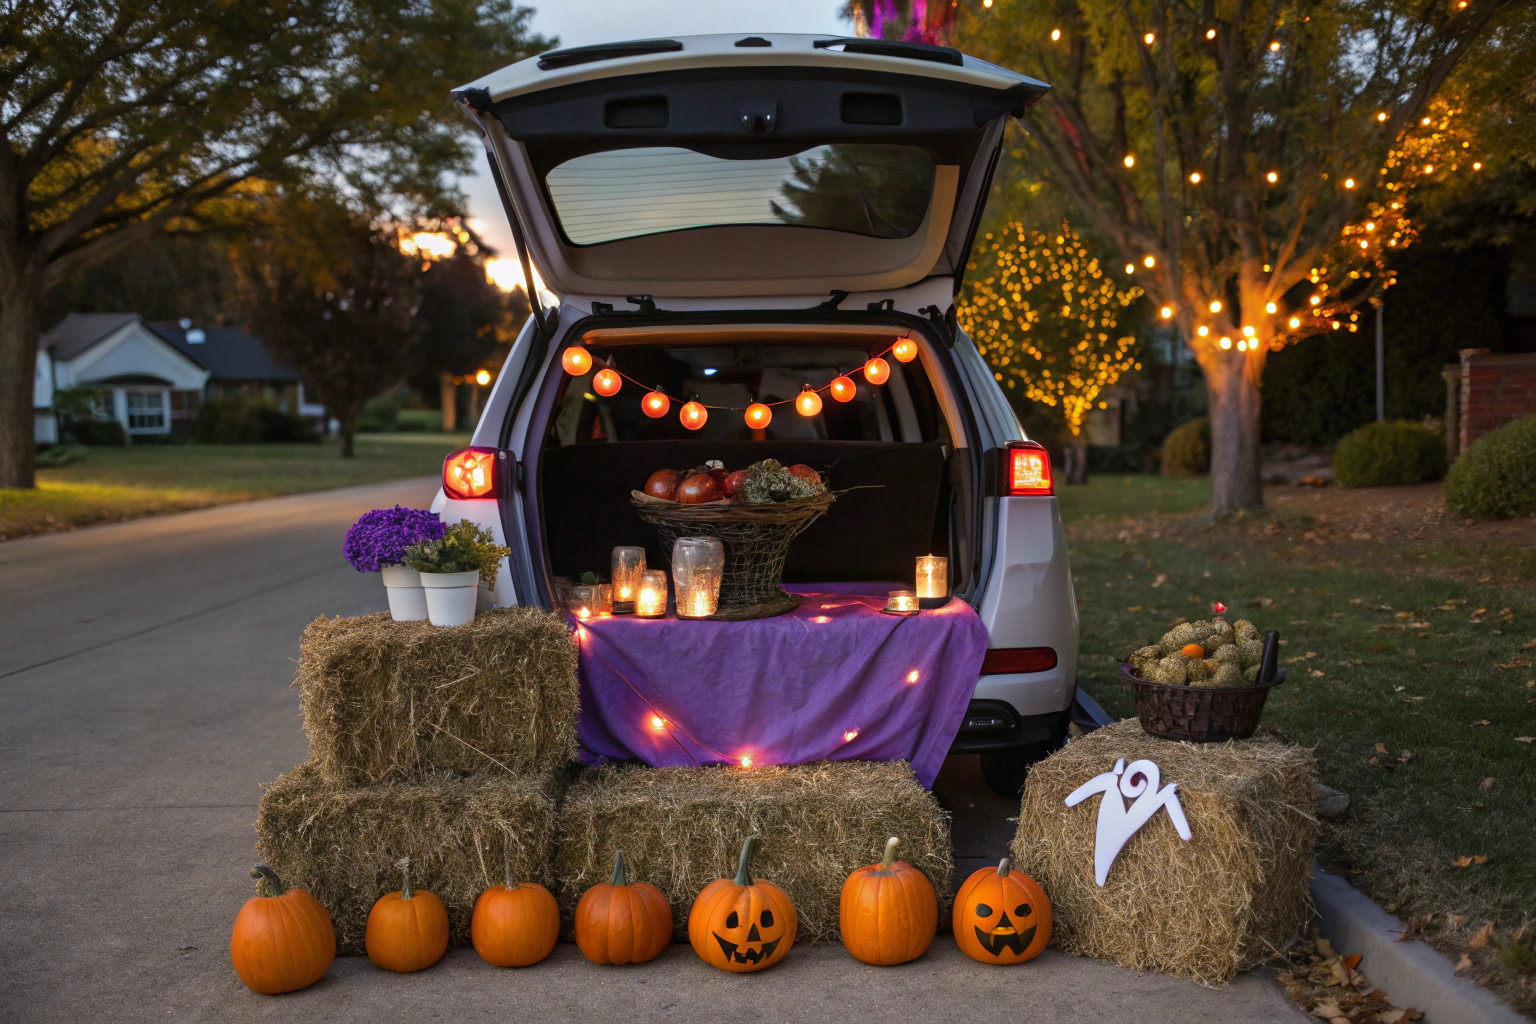
Pumpkin Farm Stand
My pumpkin farm stand display, complete with hay bales, corn stalks, and pumpkins of every size, celebrated autumn’s harvest bounty rather than spooky themes. I incorporated an interactive element where children could “pick” small pumpkins from a carefully arranged display, creating a charming farm market experience that captured Halloween’s agricultural roots while providing a delightful hands-on activity.
Classic Halloween Themes with a Spooky Twist
Traditional Halloween symbols provide the perfect foundation for creative displays because they’re instantly recognizable while offering endless possibilities for unique interpretation. My personal ranking of the most successful classic themes, based on crowd reactions at multiple community events, consistently places graveyards, witches, and ghosts at the top of the list. These themes work particularly well because they’re cost-effective to execute, require materials easily found at dollar stores, and tap into Halloween imagery that spans generations.
What transforms a basic Halloween display into something memorable is adding unexpected elements that surprise and delight visitors. Rather than simply arranging store-bought decorations, I’ve learned to incorporate interactive features, personalized touches, and creative twists that make familiar themes feel fresh and engaging. The most successful classic displays tell a story or create an immersive experience that goes beyond static decoration.
Haunted Graveyard Trunk Display
Creating an effective graveyard display starts with understanding that tombstones serve as your canvas for both spookiness and humor. My technique involves crafting tombstones from foam board, which is lightweight, easy to cut, and takes paint beautifully. I’ve perfected a weathering technique using gray base paint followed by darker accents in crevices and lighter dry brushing on raised areas to create an aged, authentic appearance that photographs beautifully in both daylight and evening conditions.
The interactive element that sets my graveyard apart involves personalizing tombstones with humorous epitaphs that make visitors smile rather than shudder. “Here lies my diet, it was sweet” and “RIP to my sleep schedule” have become crowd favorites, creating photo opportunities while maintaining the spooky atmosphere. I source materials affordably from foam board at dollar stores, acrylic paints from craft stores during sales, and skeleton hands from post-Halloween clearance sections.
Sound effects elevate the entire experience, and I’ve found that subtle audio elements work better than loud, startling noises. A small Bluetooth speaker hidden among the decorations plays a loop of gentle wind sounds, distant thunder, and occasional owl hoots, creating ambiance that draws people in rather than scaring them away. The key is keeping volume low enough that it enhances rather than overwhelms conversation.
“According to a 2025 Good Housekeeping survey, 62% of parents said a cemetery or graveyard theme made trunk-or-treat events more spooky and fun for kids, especially when illuminated with glowing tombstones and fog machines.”
— Good Housekeeping, September 2025
Source link
- Cut foam board into tombstone shapes using templates
- Paint tombstones with gray base coat and add weathering effects
- Write humorous epitaphs with washable markers
- Secure tombstones to car using weighted bases
- Add skeleton hands emerging from ‘graves’ using garden stakes
- Drape artificial cobwebs between tombstones
- Position battery-operated lanterns for eerie lighting
Witch’s Brew and Potion Station
My witch’s potion station became a neighborhood favorite by focusing on interactive elements that let children participate in the magic-making process. The centerpiece involves a large black cauldron that I make “bubble” using a simple combination of dry ice and warm water, creating dramatic fog effects that photograph beautifully while remaining completely safe when properly handled. I’ve developed a system using a small cooler inside the cauldron to contain the dry ice, ensuring no direct contact while maintaining the visual effect.
The potion bottles surrounding the cauldron contain child-safe “magical” drinks that I prepare using food coloring, glitter, and clear liquids in interesting containers. My recipe includes different colored waters with labels like “Courage Potion” and “Friendship Elixir,” which I offer to children as special treats. These bottles, collected throughout the year from interesting shapes found at thrift stores, create an authentic apothecary appearance when arranged with appropriate lighting.
Sound effects for this display focus on bubbling cauldron noises and mystical background music that I play through a small speaker hidden beneath the display. I’ve found that incorporating witch-themed music from popular movies helps children immediately understand the theme while creating a playful rather than frightening atmosphere. The combination of visual effects, interactive elements, and familiar audio cues makes this display consistently popular across all age groups.
Glowing Eyes in the Dark
When time constraints forced me to create a last-minute display, I discovered that sometimes the simplest approaches create the most intriguing effects. Using only toilet paper rolls, glow sticks, and black fabric, I created an array of mysterious glowing eyes that generated more curiosity and excitement than some of my more elaborate displays. The beauty of this minimalist approach lies in its ability to let visitors’ imaginations fill in the details, creating a more personalized spooky experience.
My technique involves cutting eye-shaped holes in toilet paper rolls, inserting glow sticks, and arranging them at various heights behind black fabric draped across my trunk opening. The varying eye positions suggest different creatures lurking in the darkness, while the soft green glow creates mystery without menace. Adding subtle sound effects of rustling leaves and distant animal calls enhances the forest-at-night atmosphere that this simple visual suggests.
Glam Cemetery
Elevating the traditional cemetery theme with metallic paints, fairy lights, and carefully styled elements created one of my most photographed displays and proved that elegance and spookiness can coexist beautifully. Using silver and gold spray paint on traditional tombstone shapes, combined with battery-operated fairy lights woven throughout the display, I created an otherworldly cemetery that felt more enchanted than frightening. This sophisticated approach appeals to a broader audience while maintaining clear Halloween identity.
The key elements that distinguished this display included metallic skeleton decorations positioned as if tending elegant gardens, LED candles in hurricane lanterns for safe atmospheric lighting, and carefully arranged silk flowers in deep purples and burgundies. This upscale aesthetic attracted positive attention from both children drawn to the sparkly elements and adults who appreciated the artistic approach to Halloween decoration.
Interactive Spooky Trunk Ideas
Interactive displays create the most memorable trunk or treat experiences because they transform passive observers into active participants in the Halloween story. My philosophy centers on the understanding that engagement reduces fear while increasing enjoyment, making even traditionally scary elements more approachable for sensitive children. Through years of experimentation, I’ve discovered that interactive elements often become the detail children remember most vividly long after the event ends.
Turn your trunk into a conversation starter with themed questions and games—perfect for families who love interactive fun: Road Trip Questions for Family Bonding and Fun Chats.
The most successful interactive displays incorporate multiple senses while providing clear instructions for participation. Children respond enthusiastically when they understand their role in the experience, whether that’s helping catch escaped ghosts, brewing magical potions, or solving Halloween mysteries. These displays typically receive more attention and generate longer conversations, creating opportunities for genuine community connection beyond simple treat distribution.
Planning interactive elements requires considering traffic flow, safety implications, and age-appropriate complexity levels. My most effective displays accommodate different comfort levels by offering multiple ways to participate, ensuring that shy children can observe while bold ones can fully engage with all interactive features.
“For Halloween 2025, haunted mermaid coves featuring blue sheets, skeletons, and lantern jellyfish are trending as one of this year’s most chilling trunk-or-treat setups, gaining popularity in neighborhood events across the US.”
— The Pioneer Woman, October 2025
Source link
Spooky Fortune Teller Booth
Transforming my trunk into a mystical fortune teller booth with a crystal ball centerpiece allowed me to offer children pre-written “fortunes” containing positive Halloween messages while wearing an elaborate costume that became part of the interactive experience. The crystal ball, created using a clear glass bowl over a battery-operated light, served as both decoration and focal point for the fortune-telling activity that delighted visitors of all ages.
My collection of age-appropriate fortunes focuses on Halloween fun and treats rather than traditional fortune-telling themes, ensuring that all messages leave children feeling excited about their evening ahead. The interactive element involves children choosing colored cards from a decorated box, each containing fortunes like “A magical adventure awaits you this Halloween!” or “Your costume will bring you extra treats tonight!” This approach maintains the mystical atmosphere while guaranteeing positive experiences for all participants.
| Age Group | Sample Fortune Messages |
|---|---|
| Ages 3-5 | You will find the biggest candy bar tonight! |
| Ages 6-8 | A magical adventure awaits you this Halloween! |
| Ages 9-12 | Your costume will bring you extra treats tonight! |
| All Ages | Friendship and fun will follow you home! |
Monster Laboratory with Mad Scientist
Creating a monster laboratory display that incorporates safe “experiments” for children to observe transforms the traditional mad scientist theme into an educational and entertaining experience. My laboratory setup includes bubbling beakers created using baking soda and vinegar reactions, colorful “potions” made from food coloring and water, and dry ice effects that I handle with proper safety equipment while children watch from a safe distance. These simple chemical reactions appear magical to young observers while remaining completely safe under adult supervision.
The educational component of this display allows me to explain basic science concepts while maintaining the spooky atmosphere, creating an experience that parents appreciate for its learning potential. I’ve incorporated elements like color-changing solutions, fizzing reactions using Alka-Seltzer tablets, and glowing liquids created with tonic water under blacklight. Safety precautions include keeping all chemicals in clearly labeled containers, maintaining safe distances for spectators, and having safety equipment readily available.
The interactive elements include allowing children to help measure ingredients for safe reactions, choose colors for “potions,” and activate certain experiments by pushing buttons or pulling levers connected to my setup. This hands-on approach makes the scientific concepts more engaging while giving children agency in the experience, resulting in displays that educational and entertaining for the entire family.
- Baking soda and vinegar reaction in clear containers for bubbling effect
- Food coloring in water bottles to create colorful ‘potions’
- Dry ice in sealed containers (adult supervision only)
- LED lights under colored water for glowing experiments
- Alka-Seltzer tablets for fizzing reactions
- Cornstarch and water mixture for ‘slime’ consistency
Spooky Romantic Dinner for Two
One of my most unexpectedly popular displays featured two skeleton figures seated at a small table set for a romantic dinner, complete with candles, wine glasses, and a checkered tablecloth. This humorous take on Halloween decoration generated more laughter and photo opportunities than many of my more elaborate setups, proving that unexpected humor can be just as engaging as traditional spooky elements. The scene’s absurdity made it approachable for all ages while maintaining clear Halloween theming.
The details that made this display special included a handwritten “menu” featuring items like “Bone Appetit Soup” and “Till Death Do Us Part-mesan Pasta,” along with small touches like skeleton hands positioned to hold utensils and napkins tucked into ribcages. Children delighted in reading the menu items aloud and posing for photos with the romantic skeleton couple, creating lasting memories through humor rather than scares.
Candy Land Game Experience
Creating a life-sized Candy Land experience leading to my trunk involved laying out a colorful path using poster board squares that matched the classic board game colors, complete with oversized candy decorations and character cutouts from the game. Children could follow the rainbow path to reach my trunk, encountering giant gumdrops, peppermint decorations, and familiar game landmarks along the way. This interactive approach transformed the simple act of approaching a trunk into a game experience that built excitement.
The interactive elements included oversized dice that children could roll to determine how many spaces to move along the path, character cards they could draw for special movements, and candy-themed obstacles that required simple actions like hopping or spinning. Parents appreciated the nostalgic connection to their own childhood game experiences, while children enjoyed the physical activity and game-playing aspects that made treat collection feel like an adventure rather than a simple transaction.
Movie and TV Inspired Spooky Trunks
Entertainment franchises provide instantly recognizable themes that create immediate excitement and connection with visitors, making them consistently successful choices for trunk or treat displays. My experience with movie-inspired trunks has taught me that recognition factor often outweighs elaborate execution—a simple but clearly identifiable theme generates more positive response than a complex display that visitors can’t immediately categorize. The key lies in selecting properties that span age groups and incorporating iconic elements that make the theme unmistakable.
Copyright considerations require creating displays that are “inspired by” rather than directly copying entertainment properties, which actually encourages more creativity in interpretation and execution. I’ve found that focusing on color schemes, iconic symbols, and general themes rather than exact reproduction allows for personal creativity while maintaining clear connections to beloved franchises. This approach also makes displays more budget-friendly since generic decorations can be styled to suggest specific properties without requiring licensed merchandise.
Nightmare Before Christmas Display
My Nightmare Before Christmas display that won our community contest incorporated Tim Burton’s distinctive visual style through careful attention to color palette and character representation. The centerpiece involved creating Jack Skellington’s iconic spiral hill using black fabric draped over a frame, with white paint creating the winding path that leads to Halloween Town. Character cutouts of Jack, Sally, and Oogie Boogie, created from foam board and painted in the movie’s distinctive style, provided immediately recognizable focal points that delighted fans of all ages.
The atmospheric elements that elevated this display included playing the movie’s soundtrack on a loop, using purple and green lighting to create the otherworldly atmosphere, and incorporating interactive elements like a “What’s This?” discovery box filled with Christmas ornaments that children could examine. The combination of visual recognition, familiar music, and hands-on exploration created an immersive experience that transported visitors into the movie’s world.
The specific techniques that made this display successful included using cardboard and black paint to create dimensional tombstone shapes, crafting character silhouettes from foam board for easy transport and storage, and incorporating battery-operated string lights in appropriate colors to create the magical lighting that defines Burton’s aesthetic. These materials proved both cost-effective and durable for multiple uses.
| Display Element | Materials Needed | Difficulty Level |
|---|---|---|
| Spiral Hill Backdrop | Black fabric, white paint, cardboard | Intermediate |
| Jack Skellington Cutout | Foam board, black/white paint | Beginner |
| Oogie Boogie Figure | Burlap sack, stuffing, glow sticks | Advanced |
| Halloween Town Sign | Wood plank, paint, mounting hardware | Beginner |
Ghostbusters Ghost Containment Unit
Transforming my trunk into a Ghostbusters containment unit using LED lights, clear plastic containers, and simple ghost cutouts created an interactive experience where children could help “capture” loose spirits that had escaped from the unit. The display incorporated flashing lights and sound effects from the movie to create authenticity, while the ghost-catching activity provided hands-on engagement that made children feel like junior Ghostbusters participating in the action.
The interactive element involved providing children with toy “proton packs” (cardboard boxes with LED lights) and having them help corral paper ghost cutouts that I had scattered around the area. This role-playing aspect proved incredibly popular with children who wanted to feel heroic rather than scared, transforming potentially frightening ghost imagery into an empowering adventure experience that generated lasting positive memories.
Hocus Pocus Sanderson Sisters Theme
My Hocus Pocus display centered around recreating the Sanderson Sisters’ cottage atmosphere with spell books, brewing cauldrons, and flying broomsticks positioned throughout the trunk area. Incorporating famous quotes from the movie as signs and playing the soundtrack created immediate recognition for fans while introducing the characters to children unfamiliar with the film. The witch theme allowed for elaborate costume coordination, with family members dressing as the three sisters to complete the immersive experience.
The interactive elements included a spell book where children could read “incantations” (silly rhymes about Halloween treats), a bubbling cauldron where they could add ingredients to magical brews, and broomsticks they could pose with for photos. These activities maintained the magical atmosphere while ensuring all interactions remained playful rather than frightening, successfully balancing the movie’s slightly scary elements with family-friendly fun.
Hogwarts Harry Potter Magic
Creating a Hogwarts-inspired display complete with floating candles, house banners, and magical artifacts transported visitors into the wizarding world through careful attention to iconic details from the beloved series. Battery-operated candles suspended on fishing line created the Great Hall’s floating candle effect, while house banners provided color and immediate recognition for fans. A sorting hat activity allowed children to be “sorted” into houses and receive corresponding treats, creating personalized interaction that enhanced the magical experience.
The magical elements that made this display special included a “Platform 9¾” entrance created using brick-patterned fabric, potion bottles filled with colorful liquids and labeled with spell ingredients, and a collection of “magical artifacts” that children could examine and ask questions about. The combination of visual spectacle and interactive exploration created an educational component that parents appreciated while maintaining the wonder that makes the Harry Potter world so appealing to children.
Emerald City from Oz
My Wizard of Oz Emerald City display focused on creating the vibrant, colorful world that contrasts so dramatically with the sepia-toned Kansas scenes, using emerald green fabric, yellow brick road elements, and character representations to transport visitors over the rainbow. The yellow brick road leading to my trunk, created using yellow poster board squares, provided a clear path for trick-or-treaters while building anticipation for the magical destination ahead.
The iconic elements that made this theme immediately recognizable included ruby slippers positioned prominently in the display, the Wicked Witch’s legs sticking out from under my car (a humorous touch that delighted visitors), and emerald-colored lighting that bathed the entire area in the magical green glow associated with the Emerald City. Character cutouts of Dorothy, the Scarecrow, Tin Man, and Cowardly Lion provided photo opportunities while maintaining the story’s adventurous, optimistic spirit.
Inside Out Emotions
My Inside Out themed trunk featuring the five emotions from the popular Pixar movie used color psychology to create distinct areas representing Joy, Sadness, Anger, Fear, and Disgust, with each emotion’s signature color dominating its section of the display. Interactive “memory orbs” created from clear plastic balls filled with colored lights allowed children to collect different colored memories as treats, creating a connection between the movie’s concepts and the trunk or treat experience.
The educational component involved explaining how different emotions help us navigate experiences, using Halloween as an example of how excitement, nervousness, and joy can all coexist in a single activity. This approach provided parents with conversation starters about emotional intelligence while maintaining the fun, colorful atmosphere that made the display visually appealing to children who might not have seen the movie but still enjoyed the bright colors and interactive elements.
Quick and Easy Last Minute Spooky Trunk or Treat Ideas
Not everyone has weeks to prepare elaborate displays, and some of my most praised setups were created under significant time pressure when other commitments interfered with my usual extensive planning process. These experiences taught me the value of identifying high-impact elements that create maximum visual effect with minimal time investment. My “80/20 rule” for Halloween decorations focuses on the 20% of elements that create 80% of the visual impact, allowing for impressive displays even when time is extremely limited.
Simple doesn’t mean ineffective, and some of my quickest displays generated as many compliments and photo requests as elaborate setups that took days to complete. The key lies in choosing themes with strong visual recognition, using store-bought items creatively rather than crafting everything from scratch, and focusing on one or two standout elements rather than trying to create complexity. These approaches prove that enthusiasm and creativity matter more than time investment or crafting skills.
Last-minute displays also offer the advantage of using current inventory from stores, often at better prices than early-season shopping, while reducing the stress of perfect execution since there’s less time for overthinking details. Some of my most spontaneous decorating decisions resulted in creative solutions that I now incorporate into planned displays because they proved so effective under pressure.
Spider Invasion The 30 Minute Trunk
When I had only thirty minutes to create a display last year, I discovered that a spider invasion theme using primarily dollar store items could create an effectively spooky atmosphere with minimal setup time. The key to this rapid transformation involved focusing on coverage rather than complexity—draping fake spider webs across every available surface, positioning large plastic spiders strategically throughout the webbing, and adding battery-operated lights for dramatic effect created an impressive display that looked like it took hours to arrange.
My shopping list for this emergency display included fake spider webbing, assorted plastic spiders in various sizes, a black tablecloth to cover surfaces, and battery-operated string lights to create an eerie glow through the webs. The motion-activated spider that I positioned near the candy bowl provided an interactive element that delighted visitors while requiring no additional setup time beyond placing it in position and turning it on.
- Gather supplies: plastic spiders, fake webbing, black tablecloth, battery lights
- Cover car trunk and surrounding area with black tablecloth
- Stretch fake spider webs across trunk opening and car surfaces
- Place large plastic spiders strategically throughout webbing
- Thread battery-operated lights through webs for eerie glow
- Position motion-activated spider for interactive element
- Test all elements and adjust spider placement for maximum impact
Simple Mickey Mouse Theme
Creating a Mickey Mouse themed trunk using basic materials like tablecloths, poster board, and paper plates proved that universal character recognition can make even minimal decorations highly effective. The iconic three-circle Mickey head shape, created using black poster board circles, provided immediate identification while red and yellow accents completed the classic color scheme. This simple approach relied on the character’s universal appeal rather than elaborate execution.
The effectiveness of this display surprised me, as children’s enthusiastic recognition of Mickey Mouse generated as much excitement as more complex themes, demonstrating that familiar characters can carry a display even when decorative elements are minimal. Parents appreciated the nostalgic connection while children delighted in spotting Mickey elements throughout the simple but clearly themed presentation.
Race Car Pit Stop
My racing-themed trunk using checkered flags, traffic cones, and basic car-themed decorations appealed particularly to children who might not be interested in traditional Halloween imagery while still maintaining the festive atmosphere of the event. The checkered flag pattern, easily created using black and white plastic tablecloths cut into strips, provided instant racing recognition while orange traffic cones (borrowed from a construction site with permission) created an authentic pit stop atmosphere.
This theme’s success lay in its appeal to children fascinated by cars and racing, offering an alternative to supernatural themes while maintaining the excitement and energy appropriate for Halloween celebrations. The interactive element involved children posing as race car drivers with cardboard steering wheels, creating photo opportunities that captured the theme’s active, adventurous spirit.
Coordinating Your Costume with Your Trunk Theme
The most memorable trunk or treat displays feature seamless coordination between the decorator’s costume and the trunk theme, creating a cohesive presentation that transforms hosts into characters within their created worlds rather than simply people standing next to decorations. My observation over multiple events reveals that coordinated presentations generate more engagement, longer conversations, and increased photo requests from families who appreciate the complete immersive experience that thoughtful costume coordination provides.
Get the whole family involved in planning and execution—just like organizing a successful family game night: How to Plan a Perfect Family Game Night.
Planning costumes to interact with displays requires considering how the costume enhances the theme’s story, whether through character representation, color coordination, or functional elements that contribute to interactive features. My fortune teller costume, complete with flowing scarves and mystical jewelry, became an integral part of my mystical booth display, while my mad scientist lab coat and safety goggles made the monster laboratory experience more authentic and educational for visiting children.
Character Host Ideas for Popular Themes
Matching costumes to trunk themes creates opportunities for deeper storytelling and more engaging interactions with trick-or-treaters, transforming static displays into dynamic experiences where hosts become characters within the themed worlds they’ve created. Simple costume choices can be as effective as elaborate ones when they clearly connect to the display’s concept and allow for comfortable interaction throughout the evening’s events.
The most successful costume coordination involves balancing visual impact with practical considerations like weather, mobility, and the ability to distribute treats comfortably throughout the event duration. Some of my most effective character portrayals used simple costume elements that clearly identified the character while allowing for easy movement and interaction with children of all ages.
| Trunk Theme | Simple Costume | Elaborate Costume | Difficulty |
|---|---|---|---|
| Haunted Graveyard | Black robe with hood | Grim Reaper with scythe | Easy/Hard |
| Witch’s Brew | Basic witch hat and dress | Full sorceress with props | Easy/Medium |
| Fortune Teller | Colorful scarf and jewelry | Complete mystic with crystal ball | Easy/Medium |
| Mad Scientist | Lab coat and goggles | Full lab setup with beakers | Easy/Hard |
| Ghostbusters | Khaki jumpsuit | Official uniform with proton pack | Medium/Hard |
Group and Family Costume Coordination
Getting the entire family involved in themed costumes that match the trunk display creates an immersive experience that transforms the simple act of distributing treats into community theater that entertains both participants and visitors. My family’s Beauty and the Beast themed coordination, where we portrayed different characters while our trunk represented the enchanted castle, generated enthusiastic reactions from children who felt like they were visiting the actual fairy tale rather than just another decorated car.
Successful family coordination involves assigning character roles that match personality types and comfort levels, ensuring that shy family members can participate without feeling overwhelmed while extroverted members can fully embrace more interactive character roles. This approach creates opportunities for shared memories while distributing the hosting responsibilities among multiple family members, making the experience more enjoyable for everyone involved in creating the display.
Game and Toy Themed Spooky Trunks
Popular games and toys provide excellent inspiration for trunk displays because they tap into existing enthusiasm and familiarity that children already possess, creating instant excitement and engagement that traditional Halloween themes might not generate with every child. My experiences with game-themed displays taught me that these familiar concepts serve as bridges for children who might be hesitant about Halloween imagery, allowing them to engage with the holiday through comfortable, recognizable frameworks.
Game themes also offer built-in interactive possibilities since children already understand the rules and objectives associated with their favorite games, making it easier to create hands-on elements that feel natural and engaging. The recognition factor means that even simple execution can be highly effective, as children’s existing emotional connections to beloved games carry much of the display’s appeal.
Pokemon Trunk Adventure
Creating a Pokemon-themed trunk complete with Pokeball decorations, character cutouts, and interactive catching games tapped into the enduring popularity of the franchise while providing clear Halloween alternatives for families preferring non-scary themes. My approach involved transforming the trunk area into a Pokemon habitat using green fabric for grass, cardboard trees, and various Pokemon character representations that children could identify and interact with throughout their visit.
The interactive “catch a Pokemon” game, where children could throw soft Pokeballs at target areas to “capture” different Pokemon, became incredibly popular and generated return visits from children who wanted to improve their catching skills. This hands-on element transformed the static display into an active experience that combined the excitement of gaming with the social aspects of trunk or treat events, creating lasting memories beyond simple treat distribution.
Minecraft Blocks and Mobs
Recreating Minecraft’s distinctive pixelated aesthetic using cardboard boxes decorated as various game blocks created an instantly recognizable display that attracted both children familiar with the game and parents who appreciated the creative interpretation of digital concepts in physical form. The blocky, geometric shapes that define Minecraft translated perfectly to cardboard construction, making this theme both budget-friendly and visually striking when properly executed.
The interactive mining activity, where children could collect candy “ores” from designated block containers, incorporated the game’s core mechanics while providing treat distribution that felt like gameplay rather than simple candy collection. Children’s excitement about finding different types of “ores” and discussing Minecraft strategies while participating in the activity created extended engagement that went far beyond typical trunk or treat interactions.
Supplies and Resources for Spooky Trunk or Treat Success
Building a comprehensive collection of trunk or treat supplies requires understanding which items provide the best value for multiple uses versus single-event purchases, a distinction I learned through years of trial and error with various materials and suppliers. My personal “trunk or treat kit” contains essential items that I keep stored year-round, allowing for quick setup and providing foundations for multiple theme variations without requiring extensive shopping for each new display.
The most cost-effective approach involves investing in versatile basic supplies that can be adapted for multiple themes while purchasing theme-specific items as needed for particular displays. My recommended shopping strategy focuses on post-Halloween clearance sales for next year’s supplies, dollar store basics for disposable elements, and craft store sales for quality items that will be reused across multiple events and themes.
Storage considerations become important when building a supply collection, and I’ve learned to prioritize items that pack compactly and withstand repeated use over bulky decorations that might only work for single themes. Organization systems that allow quick identification and access to stored supplies make setup significantly easier and reduce the stress of last-minute preparation.
- Basic Level: Black tablecloth, battery lights, plastic spiders, fake cobwebs, foam tombstones
- Intermediate Level: Fog machine, motion sensors, sound effects speaker, colored gels for lighting
- Advanced Level: Projection mapping equipment, animatronics, professional-grade props, custom fabrication materials
Budget Friendly Alternatives for Common Decorations
Creating high-impact displays on limited budgets requires understanding which expensive decorations can be effectively replicated using common materials and simple techniques, knowledge I gained during my early trunk or treat years when financial constraints demanded creative problem-solving. Many of my most praised displays were also among my least expensive, proving that creativity and enthusiasm often matter more than budget size in creating memorable experiences.
My strategies for cost-effective decorating focus on identifying the core visual elements that create each decoration’s impact, then finding alternative materials that achieve similar effects for significantly less money. Dollar store items, household materials, and post-season clearance purchases provide the foundation for displays that rival expensive professional decorations when combined with creative application and attention to detail.
The key to successful budget decorating lies in understanding that visitors respond to overall atmosphere and creativity rather than individual item quality, allowing for strategic mixing of inexpensive materials with a few higher-quality focal pieces that anchor the entire display’s visual impact.
| Store-Bought Item | DIY Alternative | Cost Savings |
|---|---|---|
| Fog machine ($40) | Dry ice in warm water ($8) | $32 |
| Animatronic skeleton ($60) | Skeleton with fishing line movement ($15) | $45 |
| Professional tombstones ($25 each) | Foam board painted tombstones ($3 each) | $22 each |
| LED spotlights ($30) | Colored cellophane over flashlights ($5) | $25 |
| Sound effects system ($50) | Bluetooth speaker with phone app ($0-15) | $35-50 |
Safety Considerations for Spooky Trunk Displays
Developing a comprehensive safety approach for trunk or treat displays became essential after I experienced a close call with a decoration that created an unexpected trip hazard, teaching me the importance of viewing displays from safety perspectives as well as aesthetic ones. My safety checklist, refined through years of hosting events, focuses on preventing common hazards while maintaining the visual impact that makes displays memorable and engaging for visitors.
Fire safety represents the most critical consideration, particularly with the combination of decorations, electrical elements, and crowds of excited children moving through display areas. Weather considerations also impact safety planning, as wind can transform lightweight decorations into projectiles while wet conditions can create slip hazards that weren’t apparent during dry setup conditions.
The goal involves creating displays that prioritize visitor safety without compromising the creative vision, requiring advance planning and regular safety assessments throughout setup and event duration. Emergency preparedness, including having basic first aid supplies available and maintaining clear evacuation paths, provides additional security for both hosts and visitors during trunk or treat events.
- DO secure all decorations to prevent them from falling or blowing away
- DO use battery-operated lights instead of extension cords when possible
- DO keep walkways clear and well-lit for safe trick-or-treating
- DON’T use real candles or open flames in decorations
- DON’T create displays that could startle drivers or obstruct vehicle lights
- DON’T use decorations with small parts that could be choking hazards
Final Thoughts Creating Memories Beyond the Scares
Reflecting on six years of trunk or treat participation, I continue engaging in these events because of the genuine joy created through community connection and shared Halloween celebration that extends far beyond individual display aesthetics or competition aspects. The most meaningful moments occur when children’s faces light up with recognition, delight, or wonder, reminding me that the true purpose involves creating positive memories rather than showcasing decorating skills or winning contests.
One particularly touching experience involved a shy child who initially refused to approach any displays but gradually gained confidence throughout the evening, eventually helping me demonstrate my mad scientist experiments to other children and leaving with a huge smile and newfound Halloween enthusiasm. These transformative moments, where displays serve as catalysts for personal growth and community connection, represent the real magic that makes trunk or treat events special for both participants and hosts who invest time and creativity in bringing joy to their communities.
Frequently Asked Questions About Spooky Trunk or Treat Ideas
Planning and executing successful trunk or treat displays raises common questions about time investment, budget requirements, difficulty levels, and practical considerations that I’ve encountered repeatedly through my years of participation and community event organization. Understanding these practical aspects helps newcomers approach their first displays with realistic expectations while providing experienced participants with solutions to challenges they may not have considered.
The most frequent concerns involve balancing creativity with available resources, creating age-appropriate content that appeals to diverse audiences, and managing the logistics of setup, hosting, and cleanup in various weather conditions. Weather contingency planning, in particular, requires consideration since outdoor events can face unexpected challenges that indoor Halloween celebrations avoid.
Storage and reuse questions also arise frequently, as many participants want to build sustainable collections of decorations that can evolve and expand over multiple years rather than creating single-use displays that become costly over time. Understanding which materials and approaches provide long-term value helps participants make informed decisions about their trunk or treat investments.
My responses draw from practical experience with various themes, budgets, and event conditions, providing realistic guidance for both beginners planning their first displays and experienced decorators looking to refine their approaches. The goal involves sharing knowledge that helps others create successful displays while avoiding common pitfalls and unnecessary complications.
- Q: How much time should I plan for decorating my trunk? A: Simple displays take 1-2 hours, elaborate themes need 4-6 hours over multiple days.
- Q: What’s a reasonable budget for a first-time trunk display? A: $25-50 can create an impressive display using dollar store items and creativity.
- Q: How do I make my display weather-resistant? A: Use plastic tablecloths, secure lightweight items, and have backup battery power for lights.
- Q: Can I reuse decorations from year to year? A: Absolutely! Store items properly and you can build on your collection annually.
- Q: What if my display scares a child? A: Have a backup plan with extra candy and be ready to quickly modify scary elements.
Frequently Asked Questions
Creative spooky trunk-or-treat ideas include transforming your car trunk into a haunted graveyard with tombstones, fog machines, and skeleton props. Another fun option is a witch’s cauldron theme, using green lights, bubbling potions made from dry ice, and handing out candy from a large pot. For added flair, consider a zombie apocalypse setup with caution tape, fake blood, and interactive elements like reaching hands.
Use black garbage bags to line your trunk and create a dark backdrop, then add spider webs from cotton balls and string lights for eerie illumination. Incorporate household items like old sheets for ghosts or cardboard boxes painted as coffins to build a haunted scene. Keep it simple by focusing on one theme, such as a pumpkin patch, using carved jack-o’-lanterns and hay bales for authenticity.
To stand out, incorporate unique interactive elements like a fortune-telling booth with a crystal ball and tarot cards inside your trunk. Use thematic costumes that match your display, such as dressing as a mad scientist for a lab-themed setup with glowing experiments. Add personalized touches like custom signs or sound effects to draw crowds and create memorable experiences.
Interactive ideas include a “pick your poison” game where kids choose from labeled jars of candy with spooky names. Set up a mini haunted house in your trunk with pop-up ghosts activated by pulling strings. Another engaging option is a treasure hunt with clues leading to hidden treats among props like pirate skeletons or vampire coffins.
Dim lighting with red or purple LED strings combined with fog machines can instantly set a spooky mood. Add ambient sounds like creaking doors or howling winds using a portable speaker. Layer props such as cobwebs, bats, and glowing eyes to enhance the eerie vibe without overwhelming the space.
A basic spooky trunk or treat setup can cost between $20 to $50 using dollar store items like fake webs and lights. For more elaborate displays with props and sound effects, expect to spend $100 to $200. Budget-friendly options involve DIY elements from recycled materials to keep costs low while maintaining creativity.